
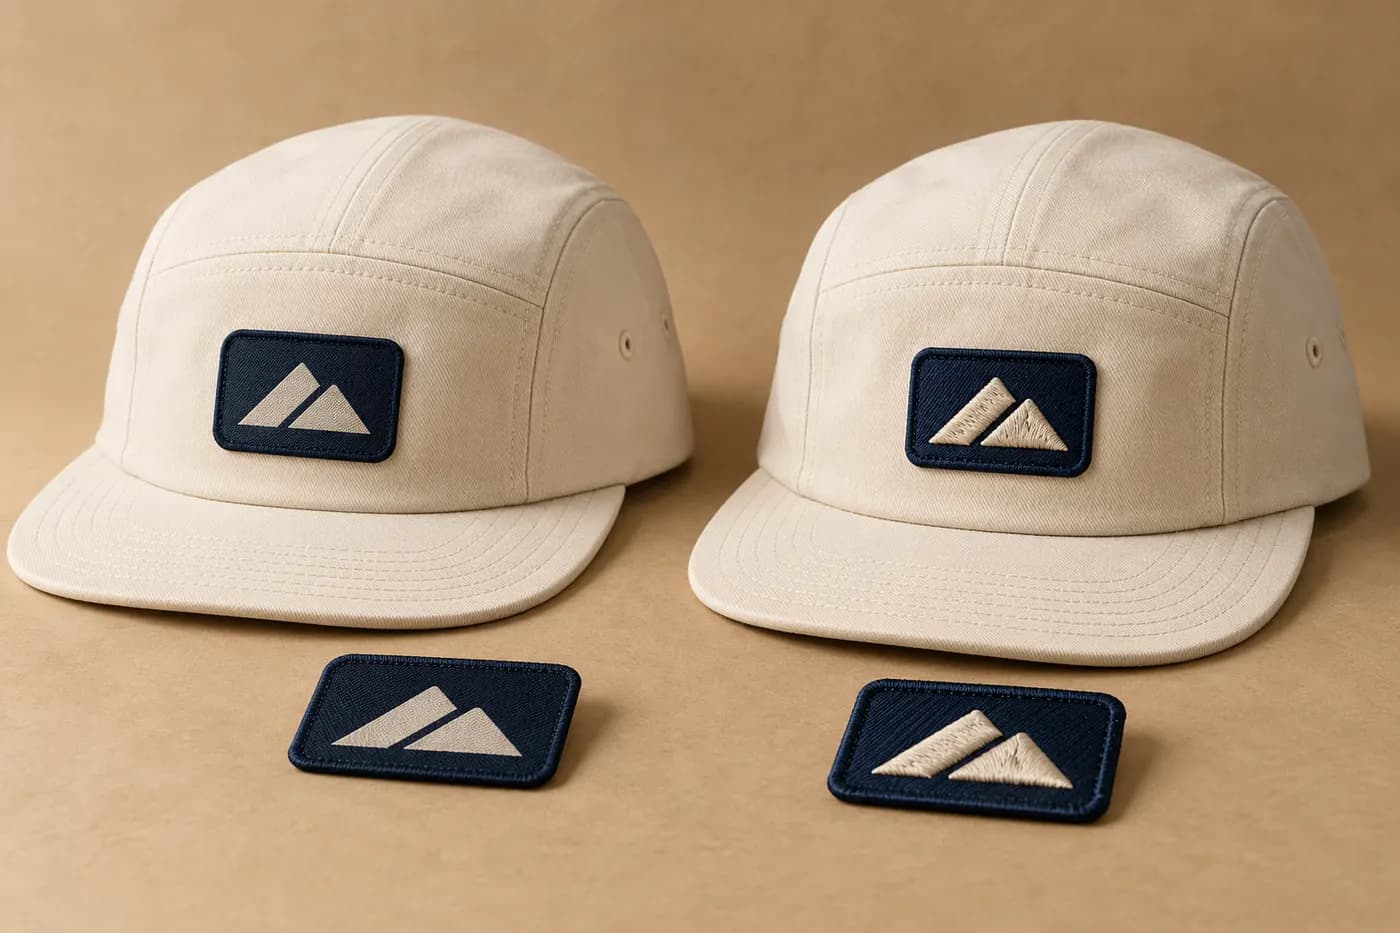
Choose for the artwork and the assembled hat
Woven vs embroidered patches is a production choice about how a brand mark will read at its finished size and how the component will sit on the hat. A woven patch generally offers a flatter, finer graphic surface; an embroidered patch emphasizes stitched texture and relief. Neither description settles the decision without the artwork, border, backing and attachment proposal.
There is a current reason for buying teams to revisit small patch details. A PPAI article dated 1 August 2026 discusses quieter headwear branding, including smaller patches, in a sponsored interview with OTTO. Orange Goods also addressed headwear patches, embroidery and labels on 11 July 2026. These are dated industry discussions, not independent proof that every buyer prefers smaller logos.
Our procurement inference is specific: as a proposed mark becomes smaller, its detail and surrounding space deserve closer sample review. The choice should follow your actual design brief. This guide, prepared on 20 October 2026, focuses on comparing two patch proposals for a bulk hat order without changing several other variables at the same time.
Compare fine detail with surface texture
Woven patch construction forms the graphic within a woven surface. Embroidered patches build a stitched design on a base. Decoration suppliers such as World Emblem and Sienna Pacific explain the resulting tradeoff between finer graphic detail and a more pronounced stitched surface. Treat those tendencies as a starting point for sampling, not a promise that every line in your artwork will reproduce.
Mark the features that matter: a small company name, narrow negative space, a fine outline or a broad emblem. Identify which can be simplified and which must remain recognizable. If a fine tagline disappears, first review its actual size and contrast. Enlarging the entire patch may solve legibility while creating a different placement problem on the cap.
Ask for a proof at the proposed finished dimensions and a physical patch where the decision depends on texture or small text. View it at normal handling distance as well as close up. An enlarged screen proof can make details seem clearer than they will be on the product. Record any artwork edits by revision so the two samples remain comparable.
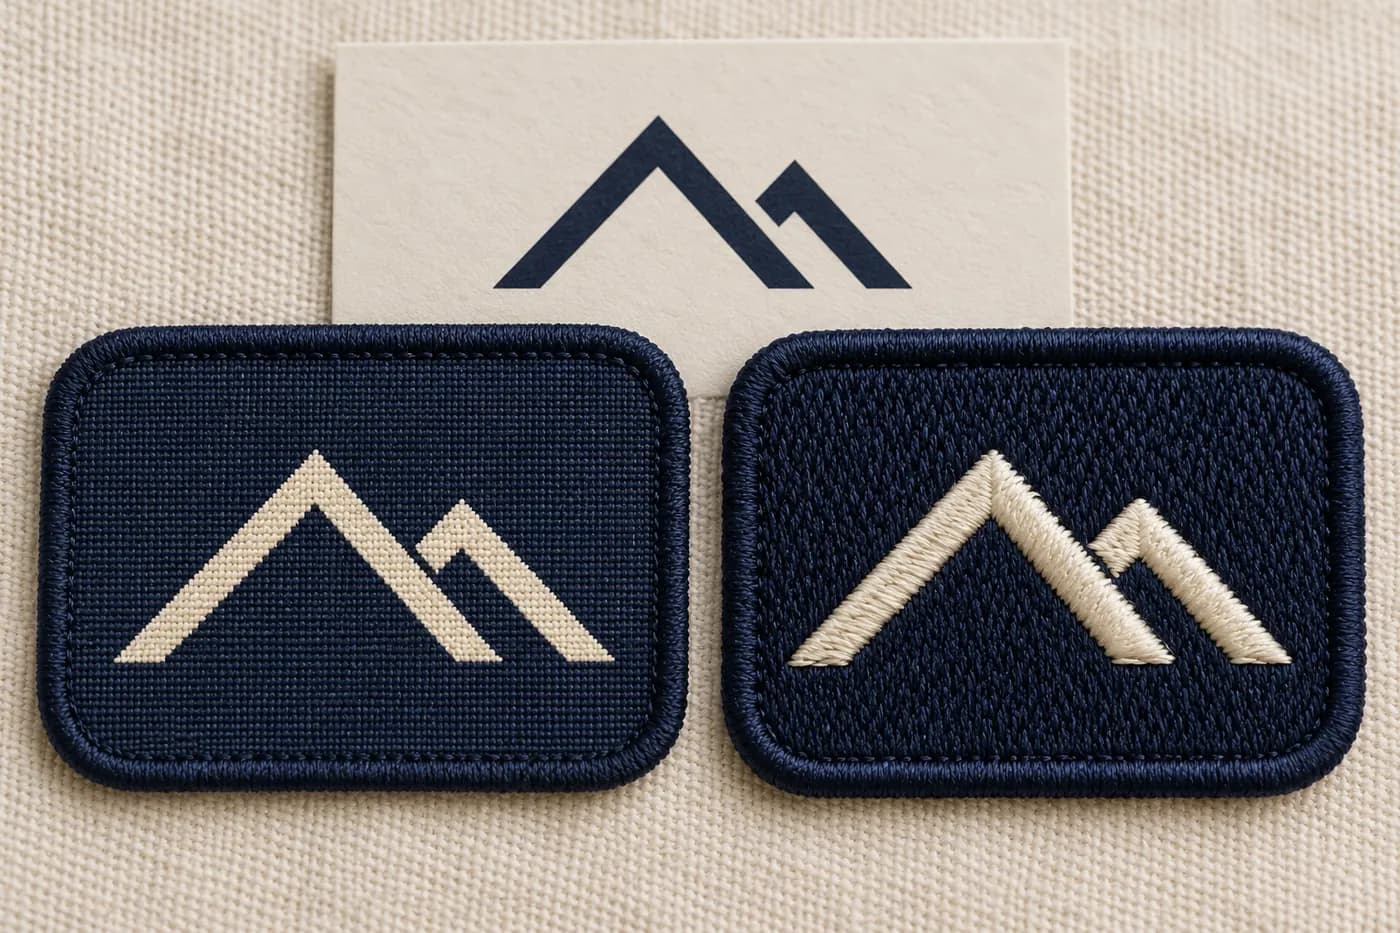
- Use the same source artwork.
- Identify fine lines and required lettering.
- Review physical texture as well as the screen proof.
Request a controlled comparison
Send the same source artwork, outer patch dimensions, color references and intended cap position for both options. Ask the supplier to identify any necessary artwork adaptation separately. Comparing a large embroidered badge with a much smaller woven badge does not isolate the construction choice; size alone can change the result.
For example, a brand might propose a 55 mm wide mountain badge with a short wordmark. That measurement is illustrative, not a minimum or guaranteed workable size. Request both versions at that width, identify the outer border and state whether the width includes it. If the lettering cannot be reproduced clearly, ask for the proposed correction before authorizing the next sample.
Keep the trial simple enough to interpret. If the supplier changes the thread colors, border shape and patch size as well as the process, ask which change addresses which concern. Review one controlled pair first, then develop the preferred version. This produces an approval record that explains the decision rather than a collection of unrelated attractive samples.
- One artwork revision and one finished outline.
- Identified color references and border dimensions.
- The same hat construction and proposed placement.
- Written notes for every process-specific adaptation.
Approve the edge and attachment on a curved panel
A loose patch is only one part of the product. Ask the supplier to describe the edge finish, backing and proposed attachment separately. Do not assume a woven patch must have one border type, or that an embroidered patch arrives ready for the same sewing method. The quotation and sample should identify what is actually being proposed.
Position the patch on the intended crown, including any center seam. Inspect the assembled hat from the front and side, then check the inside at the attachment area. Look for lifted edges, puckering, uneven placement and an inside finish that differs from the approved reference. Record observations against the specific sample; appearance alone does not establish long-term durability.
A rope trucker adds another reference line below the graphic. Mark the intended gap between patch, rope and brim seam, and review them together. A beanie adds a different issue: locate the patch on the folded cuff as it will be worn, then examine how the decorated area behaves when the cuff is opened and returned to position.
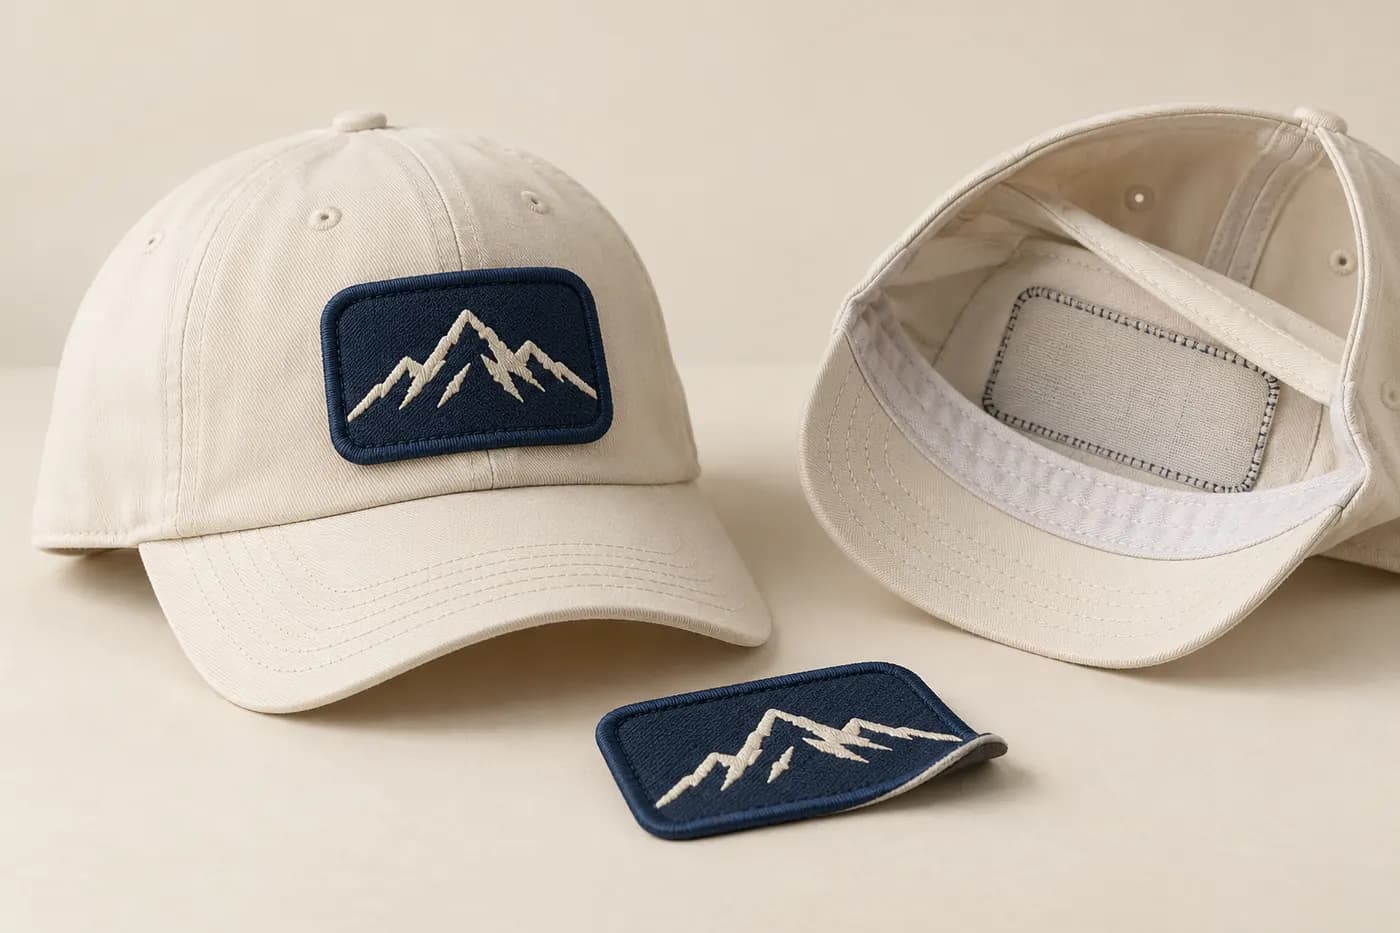
- Check the edge on the curved crown.
- Inspect placement and inside stitching.
- Keep patch and hat approval connected.
Use a decision rule for each design
For a detailed badge with fine lettering, begin by evaluating a woven proposal at the intended size. For a bold mark whose identity depends on raised stitching, begin with embroidery. These are ways to organize a comparison, not instructions to skip the other option or assume that the first sample is ready for production.
Consider an importer developing the same brand mark across a mesh-back cap and a knitted beanie. The cap may have a supported front, while the beanie places the patch on a folding cuff. Even if the loose patch is identical, placement and attachment should be reviewed on both finished products. One approval photograph should not silently cover both constructions.
Choose the preferred method by recording what passed: lettering, texture, edge appearance, placement and inside finish. If two options meet the design requirements, compare their quoted scope and development implications. If neither passes, revise the artwork or component proposal before treating price as the deciding factor.
Make the quotation cover the finished product
Request the patch construction, finished dimensions, colors, border, backing, attachment and number of positions as explicit quote items. Ask how artwork preparation, trial patches, sewn samples and later revisions are handled. A standalone patch price cannot be compared directly with a decorated hat price that includes attachment and other branding.
Do not assume woven is always cheaper, embroidery always lasts longer, or a particular backing works on every crown. Ask what the quoted option includes and what evidence is needed for any performance requirement. Where handling or care behavior matters, agree the review method for the actual hat and patch combination before approving the bulk reference.
At FORMBRIM, the bulk hat MOQ is 300 pieces per style, per color. One style in navy and cream therefore requires 300 of each, not 300 shared across both colors. A patch supplier’s separate component minimum does not replace that hat-order minimum. List each finished colorway and decoration variation clearly for confirmation.
Release one documented sample revision
Keep the accepted artwork, loose component reference where relevant, sewn hat sample and written specification together. Mark the sample identifier, date and approver, then distinguish accepted details from open changes. A note saying “patch approved” is ambiguous if it refers only to the graphic and the attachment has not yet been reviewed.
Write corrections as specific actions. For example: “Keep the approved badge width and colors; move it to the marked position above the rope, then send front, side and inside views of the revised attachment.” This tells the supplier which variables remain fixed and which need another review.
Before the order proceeds, confirm that the quotation and final artwork reflect the approved revision. If a supplier proposes a new border or backing after approval, record it as a change to assess. Retain the old reference until the replacement decision is clear; similar-looking components are not automatically the same specification.
What to send for a useful patch discussion
Send the source logo file, finished patch dimensions, critical details, color references, preferred construction and a placement drawing on the chosen hat. Add front, side and inside references if you have an existing sample. State whether you need one proposed method assessed or a controlled woven-versus-embroidered comparison.
Include quantities by style and color, the label and packing scope, destination and required arrival date. FORMBRIM can review the headwear brief and discuss decoration feasibility; the exact patch construction, attachment and appearance remain subject to confirmation and sampling. A clear brief makes the next response a specific production discussion.