
Separate the wearer's size from the hat specification
A head measurement describes the wearer. A finished-hat measurement describes a product made from panels, seams, a sweatband and possibly an adjustable closure. They are connected, but they are not interchangeable. For a private label hat order, give the manufacturer the intended wearer range and a reference for the fit, then agree how the finished sample will be measured and reviewed.
Start with a cap or hat that fits the intended audience in the way you want. Identify which features it controls: circumference, crown depth, position above the ears or overall shape. A reference can have the correct opening and an unsuitable brim, so state what to retain and what to change. “Adult one size” is a label, not a complete description of the people the product should fit.
For wearer measurements, use a flexible tape around the intended sweatband position, above the ears, without twisting or pulling tightly. Record the unit and use the same placement when repeating the measurement. New Era's official size guide demonstrates this approach and provides different charts for different cap types. Treat another manufacturer's chart as an illustration of sizing communication, not as the production specification for your custom design.
Mark measurement points before adding numbers
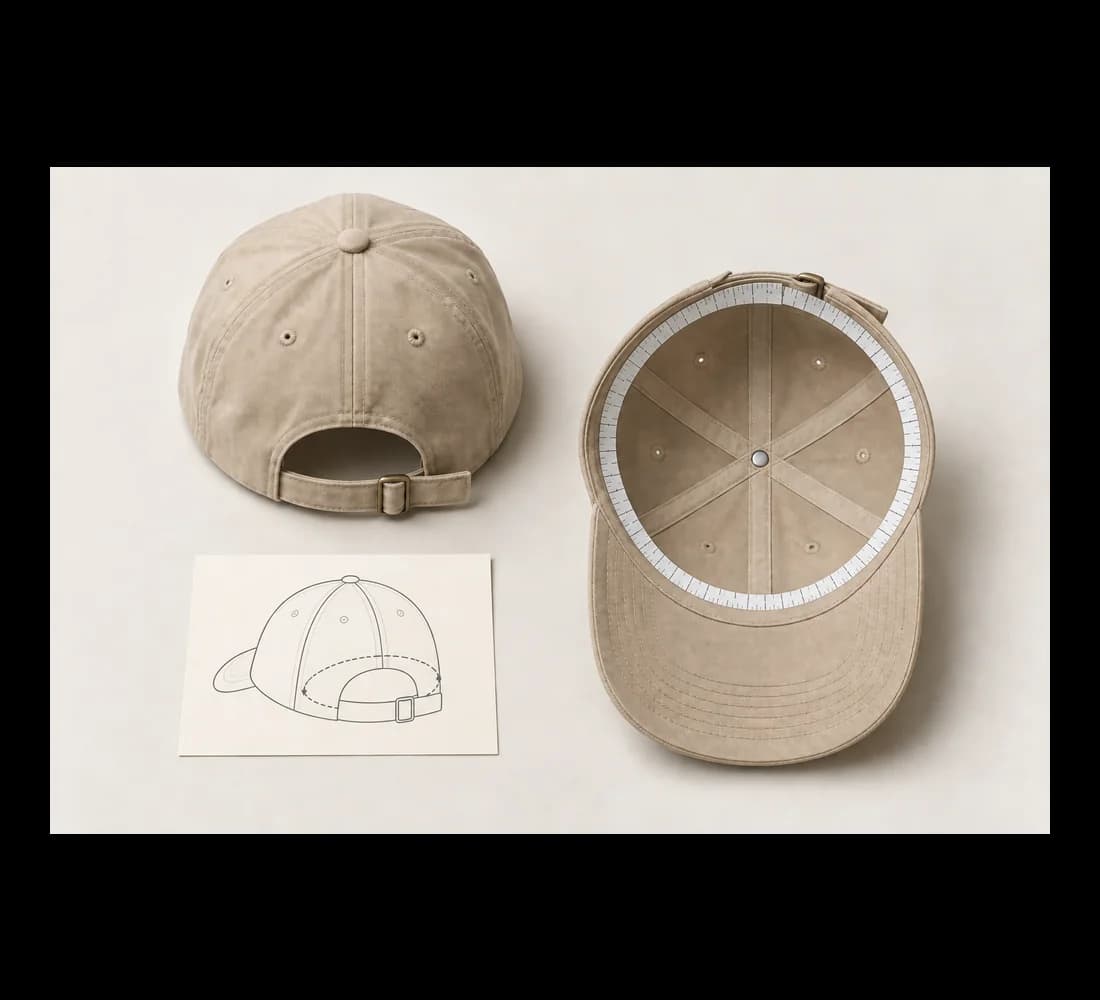
Use front, side, rear and inside views to name the dimensions you need. The opening image pairs the rear closure setting with a tape route around the inside opening. The side detail below illustrates a separate surface path with marked endpoints, not a universal crown-height method. Your own specification should name both endpoints and the path between them. Without those marks, two people can measure different things and still call the result “crown height.”
For each point of measurement, give it an identifier, describe the method and choose a unit. State whether the tape follows the surface or whether the distance is straight. Identify the seam or edge used as the start point. Record whether the cap is resting naturally, placed on a form or otherwise positioned for the check. Use the same setup for the reference and the sample; do not flatten one crown while leaving the other rounded.
Keep head circumference separate from any finished inside-band measurement. For an adjustable cap, record the closure setting used for that measurement and how the path crosses the rear opening. Do not derive a circumference by doubling a flattened width unless that method has been explicitly agreed for this construction. An annotated measurement photo is a useful check that buyer and manufacturer are following the same path.
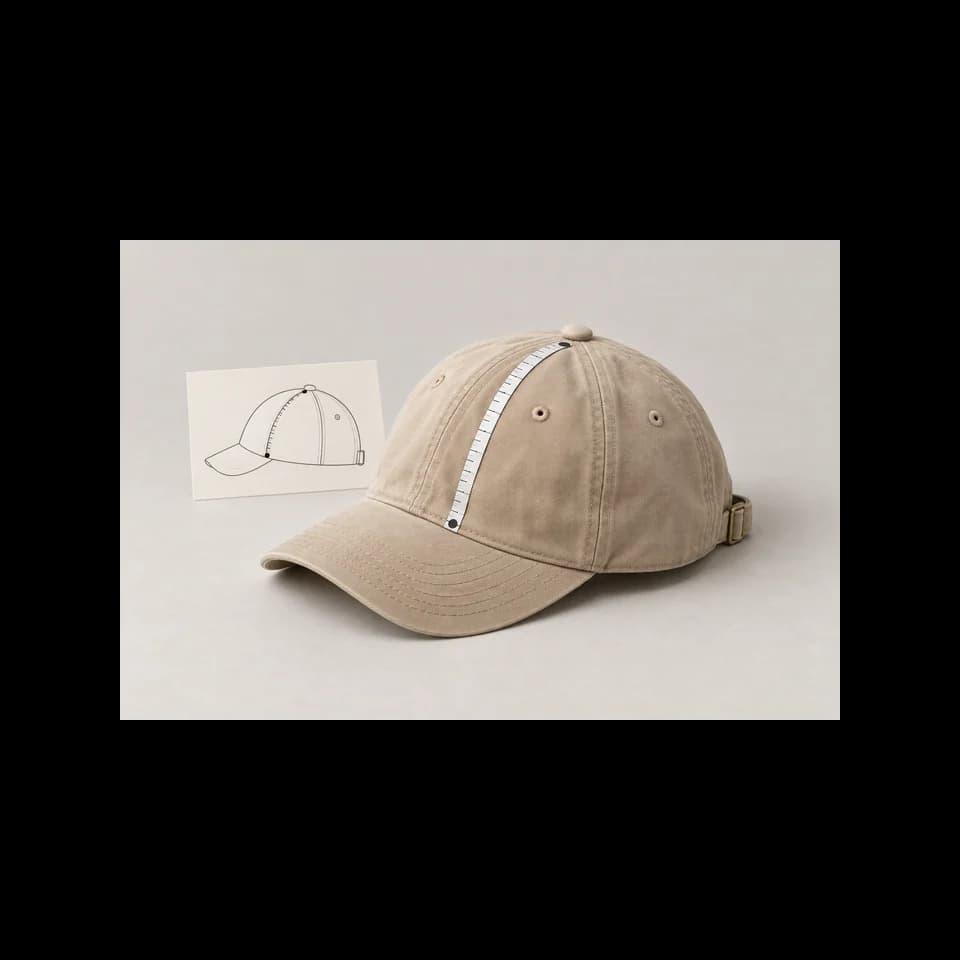
- Mark the start and end points
- Agree surface or straight-line measurement
- Record units and sample position
Specify more than the opening circumference
A cap can fit around the head and still sit too high, press against the ears or leave more space above the crown than intended. Record crown depth and profile independently of the opening. Ask the manufacturer to identify practical measurement points for those features, and include worn front and side references. If the concern is stiffness rather than size, keep that as a separate construction requirement.
Brim and closure details also belong in the fit discussion. For a cap, define the intended brim projection and curve with an agreed method; for a bucket hat, identify brim width and slope. For a strap or snap closure, show the required rear opening and the adjustment behavior you expect. Inspect the strap tail and contact with the head at the settings intended for your audience, not only at the display setting used in a product photograph.
Choose the points that control the actual design rather than filling a template with unrelated measurements. A bucket hat and a snapback do not need identical tables. For reversible designs, state how each wearing orientation will be reviewed. Keep inside band, lining and label placement visible in the sample discussion because a finished measurement alone cannot describe an uncomfortable seam or bulky contact point.
- Opening: intended wearer range and agreed finished measurement method.
- Crown: depth, front profile and worn position.
- Brim: projection or width, plus curve or slope.
- Adjustment: closure settings, rear opening and strap behavior.
- Inside: band, seams and label positions that need a comfort check.
Define size groups and workable acceptance limits
If the order needs more than one size, give each size a code and connect it to its intended wearer range, proposed finished measurements and quantity. Keep style, colorway and size in separate columns. This lets the manufacturer review the assortment and prevents a total quantity from concealing a missing size allocation. Confirm how the size breakdown fits the quotation and published minimum; do not invent a new minimum for each size.
For adjustable caps, ask which usable settings define the intended range and how those settings will be reviewed. A closure reaching its last position is not enough to demonstrate a comfortable or secure fit. Review the smaller and larger intended fits as well as the main reference fit. For a fitted design, request a size plan appropriate to that construction rather than assuming one sample proves every proposed size.
Agree acceptance limits with the manufacturer for each relevant measurement. They should refer to the material, construction and measuring method being used. Do not paste the same plus-or-minus allowance across every row because it appeared in another garment template. Record the target, agreed allowance and actual sample result separately. A permitted measurement difference is also different from an approved design change: it should not silently authorize a deeper crown or a different intended size range.
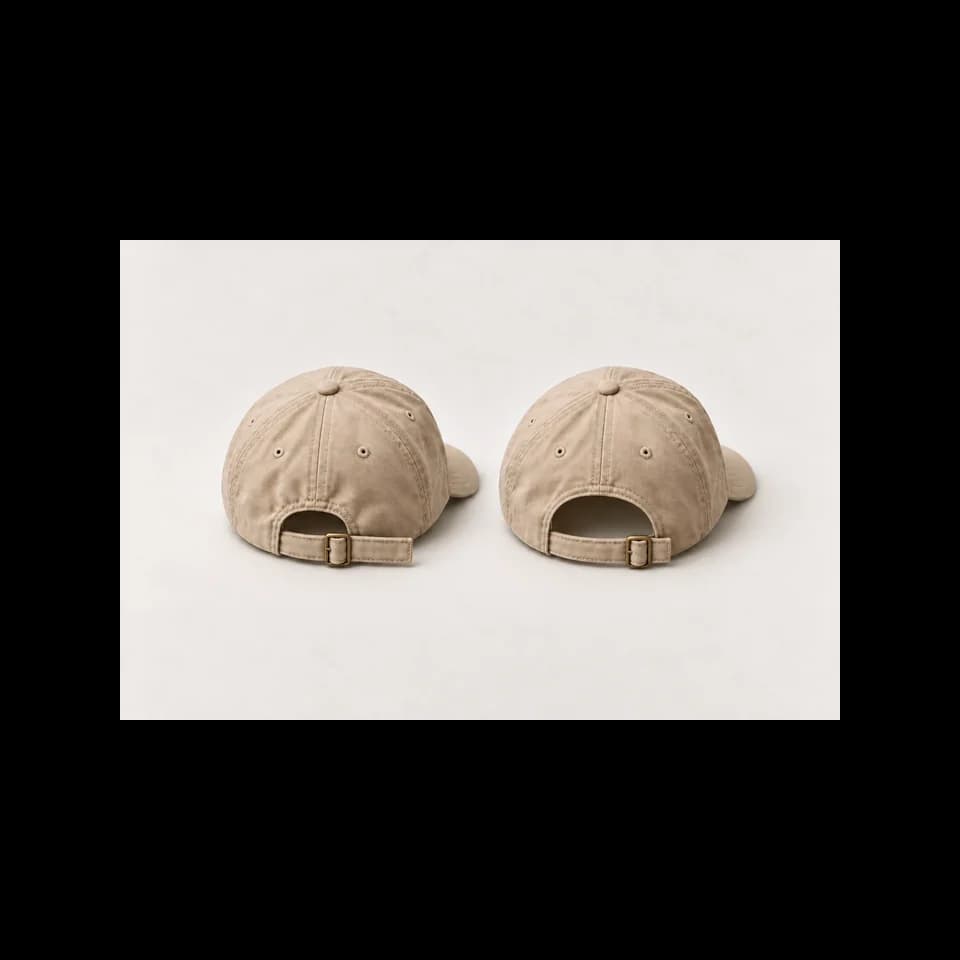
- Identify the rear strap position
- Check usable settings on intended wearers
- Record fit separately from closure travel
Review measurements and worn fit together
When the sample arrives, confirm its style, size, revision and closure setting before measuring. Compare results against the agreed points, then try the sample on the intended wearers. Use consistent views and record the adjustment used. Ask specific questions: does the band feel tight, does the crown sit at the intended level, and do the seams or closure create a localized pressure point?
If the sample measures differently from the specification, first repeat the check using the same method. A different tape path, closure setting or sample position may explain the disagreement. Send the marked measurement photograph with the reported result so the factory can reproduce it. If the measurements agree but the hat still fits poorly, describe the physical symptom rather than changing the opening automatically. The issue may need a discussion of depth, profile or an inside component.
Request another physical review when a proposed revision changes fit. Changes to the pattern, sweatband, lining, closure or relevant material can leave an earlier approval incomplete. Identify the affected size groups and ask which samples are needed to resolve the uncertainty. Keep one consolidated record for the revision, including the measurements to retain, the fit issue to correct and the details still pending. Confirm sample scope and timing before treating the new version as ready for bulk production.
Example: correct depth without enlarging the opening
An illustrative review note reads: “Style CP06, size M, sample 02, closure at the marked reference setting. The inside-band measurement at point A matches the agreed specification and is accepted. On the reference wearer, the cap sits higher above the ears than sample REF01. Review crown-depth point B against the attached side view. Keep the opening, brim and closure unchanged unless a related change is required; explain that change before preparing sample 03. Fit approval remains pending.”
This instruction names the problem without assuming the solution is a larger hat. Ask the manufacturer to confirm the point-B measurement method and proposed revision, then review the revised physical sample in the same wearing position. Record whether the change restores the intended depth without creating pressure or excess space elsewhere. If the order contains other sizes, discuss the effect on those sizes before approving the complete size plan.
Once the fit is accepted, retain the sample identifier, marked measurement sheet, size quantities and final revision together. Check that the size names used on labels and packing instructions match the order record. A later change to a material or inside component should be reviewed against that approved fit reference. The deliverable is a repeatable specification and a clear acceptance record, not simply a size chart copied from another brand.